
How to Size a Watch Bracelet for the Right Fit
Take links out evenly, fine-tune at the clasp and keep the spares: how to get a metal watch bracelet to sit right on your wrist.
Quick Facts
What a good fit feels like
A metal bracelet nearly always arrives too long. It has to close around a big wrist straight out of the box, so on most people it hangs loose until a few links come out. Shortening it is a quiet ten-minute job if you take your time, and it decides whether the watch becomes the one you reach for every morning or the one that stays in the box.
The usual test: with the clasp closed, you should be able to slide one finger, flat, between the bracelet and the top of your wrist. No more, no less. The case should rest on the forearm side of the bony bump on the outside of your wrist, and stay there when you drop your arm. How to Wear an Iced Out Watch explains why that position matters with sleeves and cuffs.

Heavy watches bend that rule a little. A fully iced 42 mm watch carries most of its weight in the head, and on a loose bracelet the head rolls around to the side of the wrist every time you reach for something. Most people end up wearing a stone-set watch a touch snugger than a plain steel one. If you are still choosing a case size, the Watch Size Guide covers that side of fit. Keep in mind that wrists swell in heat, after exercise and toward the end of the day, so a fit that feels perfect on a cool morning can pinch by evening in July.
Count the links before you pick up a tool
- Put the watch on with the case centered on top of your wrist.
- Pinch the slack together underneath, at the clasp, until the fit feels right. Count how many links gather in the pinch.
- Split that number between the two sides of the clasp.
- Turn the bracelet over and look for small arrows stamped on the inside of the links. Those links are removable. Links with no arrows, especially the ones nearest the case, are often fixed.
On the first pass, take out one link fewer than you think you need. Putting a link back is fiddlier than removing one, and the clasp gives you a few millimeters of adjustment afterward.
Pins, screws and collars
Removable links are held together in one of three ways. Look closely at the edge of a link before you start, because the method depends on which system your bracelet uses.
| System | How to spot it | How it comes out |
|---|---|---|
| Split or friction pin | Plain pin ends flush with the link; arrows on the inside | Pushed out in the direction of the arrow |
| Pin and collar | Plain pin, plus a tiny tube (the collar) inside the middle of the link | Pushed out with the arrow; the collar drops free and must go back in |
| Screw pin | A screwdriver slot in the pin end on one or both sides | Unscrewed with a blade that fills the slot exactly |
Screw pins are sometimes fitted with thread-locking compound at the factory, so the first quarter turn can feel stiff. If the screwdriver starts to slip, stop. A chewed-up slot is the most common way a simple link job turns into a trip to the watchmaker.
Removing links step by step

- Lay the bracelet flat with the clasp in the middle and the inside facing up, so you can read the arrows.
- Support the link so the pin has somewhere to go. A bracelet holding block with a slot underneath is ideal.
- Press the pin pusher against the pin end and push in the direction of the arrow. Start with steady hand pressure. If the pin will not move, give the pusher a few light taps with a small hammer.
- Once the pin stands proud on the far side, draw it out with your fingers, or with flat-nose pliers wrapped in tape.
- Do the same on the other side of the clasp.
- Rejoin the bracelet and push the pin back in against the arrow, the opposite way to how it came out, until it sits flush. On a pin-and-collar bracelet, put the collar back in the middle link first.
Taking links evenly from both sides keeps the clasp centered under your wrist. Take them all from one side and the clasp creeps toward the edge of your wrist, where it digs in, while the case is pulled off center on top. If you need an odd number out, remove the extra from one side and check how the clasp sits; a half link, if your bracelet has one, can even things up.
Half links and micro-adjust holes
Links get you close. The clasp does the rest. Most folding clasps have a short row of small holes on each side where a spring bar holds the end of the bracelet. Moving that spring bar one hole shortens or lengthens the bracelet by a small step, roughly a millimeter or two.
- Use a spring bar tool to compress the bar, slide it to the next hole and let it spring out.
- Check that both ends of the bar have clicked fully into their holes. Tug the bracelet firmly before you put it on.
- Some bracelets come with a half-length link next to the clasp. Swapping a full link for a half link gives you a size between two full-link settings.
Extra care with iced links
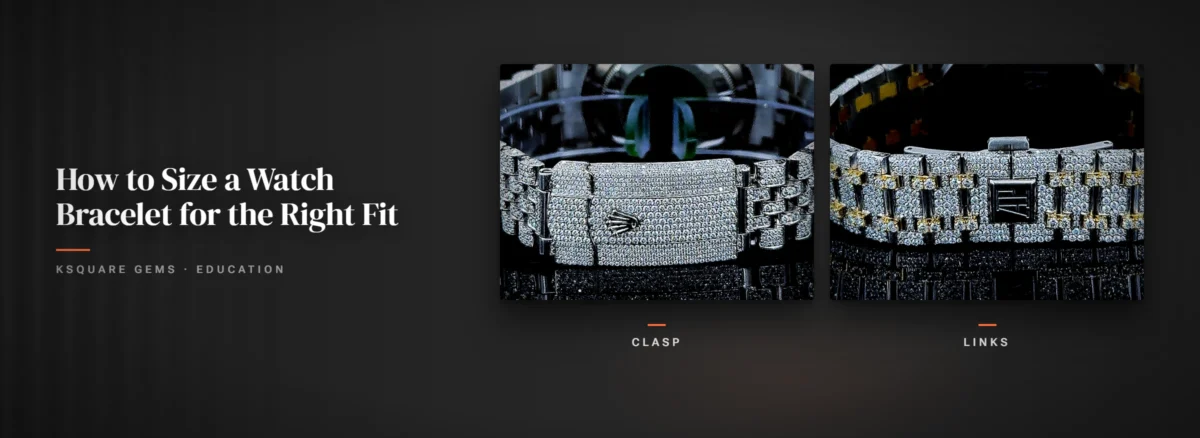
A stone-set bracelet is sized the same way, but the stones change how you handle it. The settings on top of each link were not designed to take the force of a hammer.
- Never let the stone side carry the load. Support the link by its plain edges or in a holder groove, with the set face clear of the surface underneath.
- Use light taps with a plastic, nylon or brass-faced hammer. A steel hammer that glances off the pusher can chip the edge of a stone or bend a prong.
- Keep pliers away from the set surface. Wrap the jaws in tape and grip plain metal only.
- Afterward, check every link you worked on in good light. Press gently on each stone nearby with a fingernail. A stone that moves needs tightening before it falls out.
For more on how those stones are held in, see Stone Settings Explained.
When to hand it to a jeweler
A jeweler or watchmaker sizes bracelets every day and usually does it while you wait. Let them do it if:
- a screw will not turn, or the slot is already damaged;
- there are no arrows and the pins will not move with gentle pressure;
- the stones run over the sides of the links, leaving nowhere safe to support them;
- you do not have a proper pin pusher and screwdriver. A thumbtack or paperclip slips, and the scratch it leaves is permanent.
If there is any chance you will send the watch back, read our Refund & Return Policy before you remove a single link.
Keep every link you remove
Put the spare links and any loose pins in a small bag, label it with the watch, and keep it with the box. Wrists change, watches get passed on, and a damaged link is far easier to replace from your own spares. Iced links are the ones you least want to lose: finding a replacement later means matching the stone size, the setting and the exact plating color of the rest of the bracelet.
Once the fit is right, keep the bracelet clean so grime does not build up between the links. How to Clean an Iced Out Watch covers it step by step.
Frequently Asked Questions
Put the watch on, pinch the slack together at the clasp until it fits, and count the links in the pinch. Remove that number, split evenly between both sides of the clasp, and start with one fewer than you think.
In the direction of the small arrow stamped on the inside of the link. When you put the bracelet back together, insert the pin the opposite way.
Not safely. Improvised tools slip and scratch the links, and on an iced bracelet they can damage the settings. A pin pusher and the right screwdriver, or a quick visit to a jeweler, is the better route.
Use the micro-adjust holes in the clasp to move the spring bar one hole at a time. If the gap is bigger than that, a half link near the clasp can bridge it.




Worldwide Delivery
Enjoy complimentary overnight shipping with fast delivery, ensuring convenience and prompt luxury service.
14 Days Returns
Experience peace of mind with our satisfaction guarantee, ensuring premium quality and unmatched customer service.
Lifetime Warranty
Shop with confidence, backed by verified trust ratings, secure transactions, and exceptional quality assurance every time.
24/7 Customer Support
We're here for you anytime, anywhere. Our dedicated customer support team is ready to assist you around the clock.